
Table of Contents
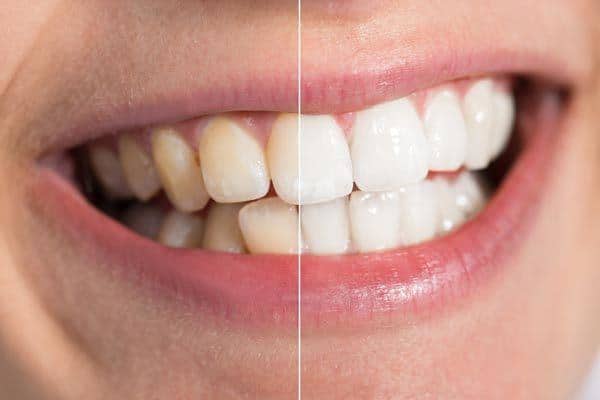
If you want to get sparkling white teeth but don’t want to see a dentist, you should look at how to apply whitening strips. An in-office teeth whitening session with your dentist can get rather costly. Whitening strips are a convenient do-it-yourself alternative that can work on teeth made yellow by beverages, poor dental hygiene, or teeth stained by a smoking habit.
And if you have never used them, read on. I will give you a step-by-step guide on how to apply whitening strips on your teeth for best results.
1. Read Instructions to apply whitening strips
Different brands have various modes of application. For instance, some require you to apply once a day while others prescribe twice. Other things you should look for in the instructions include: how long you should wear the strips at a time, and how many days you should continue your regimen.
If you don’t follow instructions, you may damage your teeth or gums.
2. Brush your teeth first
Applying the strips without brushing will cause food and bacteria to be trapped between the strip and your teeth. The food particles and debris will interfere with the process, giving an unattractive result. Brushing also eliminates plaque which would otherwise block the whitening action of the strip.
That said, don’t brush right before application. At least thirty minutes should pass after brushing before you apply the strips. The window period will allow saliva to wash away excess fluoride.
3. Examine the strips
To avoid applying incorrectly, examine the whitening strips to determine which go to the top teeth and which to the bottom set. You will also see which side of the strip should contact the surface of the teeth. The gelled side is the one you apply to the teeth. The gel acts as a whitening agent.
4. Application
Place the gelled side of the whitening strip over your teeth, ensuring the strip covers them entirely. There should be no bumps or uneven areas. Use a toothbrush to smooth out any uneven areas, running it over the strip after applying. Parts which are not covered by the strip will not experience the whitening effect.
Note that the less moisture interacts with the strip as you apply it, the better the whitening effect. So use a napkin or towel to dry the surface of your tooth before application.
5. Wait
After application, wait for the strips to do their work. How long you wait depends on the particular brand you are using – which is why you should consult the instruction guide. During this waiting period, don’t touch the strips as that will only disrupt the process.
The hardest part about this step is avoiding excess salivation. You can counteract this by lying on your back, with your mouth slightly open. Breathing through the mouth as you wait helps dry it out.
6. Removing the strips
After the specified time has passed, peel away the whitening strips and discard them. Ensure you remove them within the specified duration, as waiting too long will cause sensitivity and irritation to your teeth and gums.
Brush your teeth or rinse with water to get rid of all the gel. Do your best not to swallow the gel, as it might be toxic.
Conclusion
Repeat this process every time you have to use the strips. The instructions will inform you how long you should keep applying the whitening strips. If you sustain this for the prescribed period, you will soon have the sparkling set of teeth you desire. While you do need to take care when applying whitening strips, there is no reason why you can’t achieve those stunning white teeth you always dreamed of.